This Blog is about building model fishing ships and everything what has to do with it. Most builds are done by me but when not I will mention.
I hope you will have fun reading and watching my blog and if you like please leave a comment.

Friday 18 December 2015

Inside the wheelhouse

Hello

Thanks for watching my buildingreport and for the support I get from you. Not only in this report but in forum as whole. Your buildings really encourage me to build.

I worked on the Pelikaan again. On the wheelhouse I wanted something to watch at so I started building an interior. It's meanth to be scematic and it is not on scale. But I think it looks good later when you look trough the small windows of the wheelhouse

IMG_20151217_203154_zpsnt695ddh.jpg

IMG_20151217_203211_zpsnxckct2h.jpg

IMG_20151209_162541_zpswidgo0wx.jpg

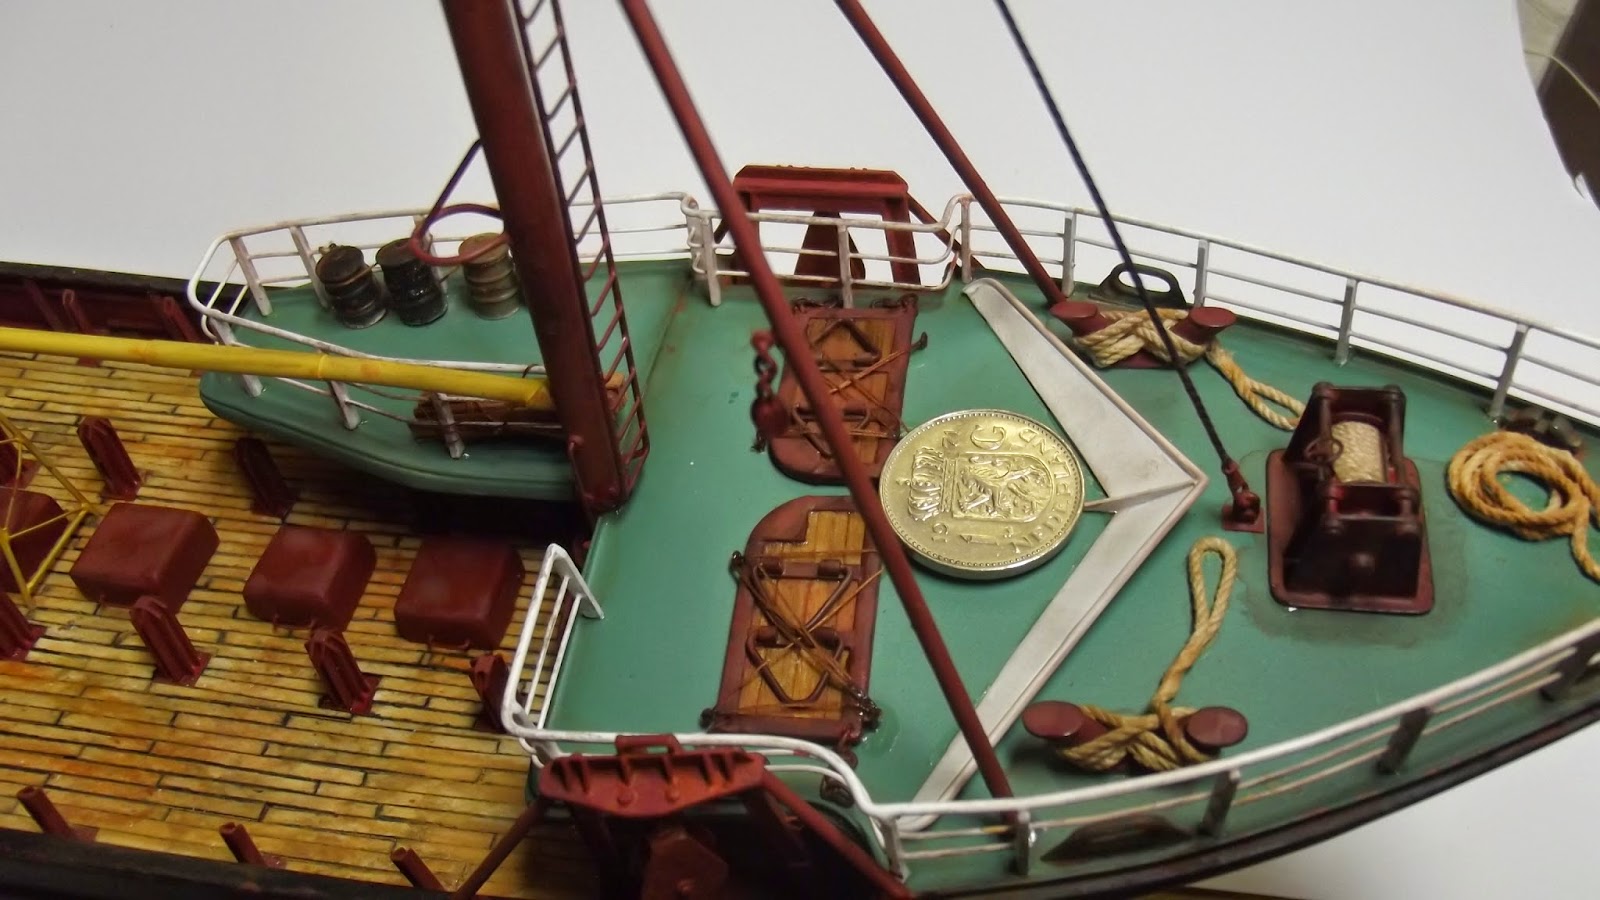
And I did some work on the hood.

Monday 14 December 2015

The roof

Hello fellow shipbuilders,

Meanwhile I made the roof and the so-called "Pet" and that makes the bridge really complete. It was very hard to find the correct shape and it took me more cardboard and ps plate than I wanted. But at the end it worked out well.

IMG_20151211_155714_zpshbt4u64c.jpg

IMG_20151211_170025_zpsdljztljn.jpg

IMG_20151211_171701_zpszotgpnaz.jpg

IMG_20151214_195207_zpssxw5or7t.jpg

IMG_20151214_195221_zpsilnet4dq.jpg


If you look closely you can still see something I've been working on. Something which will be nearly vissible when the model is ready.

Saturday 5 December 2015

More work on the wheelhouse

Hello Everybody.

Working on the wheelhouse. Lots of work and time but very rewarding.

IMG_20151203_210948_zpsnpypgjnt.jpg

Thursday 3 December 2015

Router machine

Hello people,

I wanted to buy a router but the missis wouldnt let me spend the money so I searched the bits and peaces-bin for stuff to make on myzelf. I had an old Kinzo multitool wich I could use and the necessary parts were there too. I built a router-part which is adjustable in height, a part to make circles and a part to make straight lines. 

Here's the result.


Wednesday 2 December 2015

On with the moulds

More work done on the KW88.

Prepare the moulds for laminating. It will be a two part mould. First I will prepare and laminate the first half and after that I will remove the wooden plate and laminate the second half. I have never done this before so it will be exciting. It will take some weeks before I can show the results.


Sunday 4 October 2015

Cooling

Cooling at the outside of the hul. I also finishes the bowplate and some other things. Just decided to make a keel also before making the moulds. Than every hull will be complete with keel.


Friday 25 September 2015

Added registration number

Added registration numbers and did some other jobs on the hull. Next job will be mould-making for wich I bought polyester and other stuff.

Saturday 12 September 2015

Back at work with the KW88

I started working on the beamtrawler again. In the summer it's just to hot at the attic so I can't build there. I have done some home improvement instead and build some showcases for a friend.

I sanded the hull and painted her with epoxy and the sanded her again. She has a babyskin now, soft and smooth. I also made a start with the halfround and the spraydeck.

DSCF0105_zpszejwu2ho.jpg

DSCF0108_zpsuhqkejhb.jpg

DSCF0110_zps1qpuz4nm.jpg

DSCF0111_zpslkpgh2kx.jpg

DSCF0112_zpsmyd9uwcd.jpg

DSCF0113_zpsahg7mra7.jpg

DSCF0114_zpsnzunhgme.jpg

10393830_720561064754206_429113755838707

12003238_721421728001473_446396881293241

DSCF0495_zps5ojjgple.jpg


DSCF0494_zpskonnyhd3.jpg
All halfround is placed now
12004942_723176704492642_385227637179042

Wednesday 3 June 2015

Making the hull of the KW88

Hello everybody,

At this moment I have done a lot of work for this model allready. Lots of work will not be vissible when she is ready but is inevitable to get a realistic model. But how good is the feeling when you have (after all the work) a fysical hull in your hands wich look svery good. On the pictures you see the wooden model of the hull. They call this the plug and I will use this in the future to make a polyester mould arround it so I can make multiple hulls out of it. I do this because I want to make two of the same models and maybe I can sell some hull later to other modelbuilders.

The pictures
Here you see a lot of copys of the lineplan to make templates for the longitudinal cross-sections (does that make any sense? I used Google translate so blame them if not....:) )

Posted Image

The templates are ready to trace them on the wood
Posted Image


Building the Dutch Eurotrawler KW5

Sunday 24 May 2015

New project: KW88, Pelikaan Dutch Beamtrawler 1999

Last model was a real challenge for me to build. Little was known about the ship, drawings weren't there and photo's were scarce. But I mannaged to build a good looking and correct model and I am very happy with it. But for the next model I wanted something easier. Not easier to build, but a ship from wich is more information available. I found this in the Dutch beamtrawler KW88, Pelikaan.


It's a trawler build in 1999 and named UK153 Lub Senior but sold in 2007 and renamed KW88, Pelikaan. KW means it's hometown is Katwijk. It has a 2000HP Deutz engine and the dimensions are 42,40m long and 8.50m width.
The trawler  uses two bottomtrawls (sumwings) and uses electricity to fish (pulse fishing)

The model will be in scale 1/75 wich makes a model of +/_ 56 cm (22inch)

Here a photo of the drawings I use. They are printed in scale 1/75 so very usefull


Friday 15 May 2015

End pictures KW49 Antje

Here are the final pictures of the Antje, KW49. It is a ship from the village Katwijk and I made the pictures also in Katwijk.

DSCF0017_zpscqecaqlf.jpg


Saturday 9 May 2015

Last pictures before completion

Some photo's of the progress. I made some nice copper decklights wich I like very much. They are made of ps but are painted and weathered like they are old copper lights. Next update I hope to show the completed build.

Decklights


Decklights fitted. Here will be a mast later


The reardeck with the sail in place


And a last photo from the ship like she was before refit in 1969


Wednesday 6 May 2015

Sneak preview

A little sneak preview of the work I did in the paintshop. Next pictures will come when she's finished.


Wednesday 22 April 2015

Lying the wooden deck

 Hello dear readers,

At first I had the idea to paint the deck with wood-effect but when I was at the intermodellbau I saw very thin wooden slats. I bought 10 meters with the idea that this would be mucht to much. But now I know I had barely enough, I had 20 centimeters left. I am very glad with the decision to make a real wooden deck because it looks fantastic. Later there will be stuff on the deck so it looks even better.


Wednesday 15 April 2015

Weathering a brass prop using electrolysis

I bought a nice looking prop but its much to shiny. I like to paint the ship like its in use so it needs a little weathering. And so does the propellor. In the past I tried to do this with paint but that didnt work out well. I remembered a proces from scienceclasses called electrolyse with an katode and an anode. How that works you can find on the internet but the pictures below show how I (mis) use it.

Here's what whe start with. A nice and shiny propellor.


Tuesday 14 April 2015

Tools I can't do without: Sandingsticks

Some other tool I cant do without. A few years ago I was at a Hobby fair and saw a tool wich was new to me. My wife imidiately recognized it as a nailfile. I never saw a nailfile like that before, I only knew the metal ones. This one was made of firm foam and plastic and it felt very stif. Enought words for now. I turned out to be my favourite tool for filing grinding and sanding. Its suitable for wood and plastic and they are very durable. In the local hobby shop they cost me 2 euro a piece but I found them on Aliexpress for round 2 euro for ten pieces. Not very expensive so just order some and try it out.

Some pictures to show what I am talking about.

P1030175_zpsz6ybenk9.jpg
Click for more

Sunday 12 April 2015

Tools I can't do without: hand-drills (Pin Vices)

When Iam building I have a few tools I would not want to be without. There is the hobbyknife, the steel ruler, a sandingstick and... my handdrill. 

I use is a lot but the problem is you have to change the drillbits every time you need another size. Last month I wrote down the drillsizes I use most and I came up with 5 populair sizes. 

So I ordered 4 more handdrills and I made a good looking socket for them and now I never grab wrong when I need a drill.


Models made by my father

I like to build modelships but it al started with my father. Some 20 years ago he started building a model af the ship he worked on. In the past few years he build a lot of models and some of them I want to show you here. (all models in this message were made by my father H. de Mol)


 click for more

Friday 10 April 2015

Wich paint to choose?

Hello saillors!

And the next thing. If you build a ship from the sixtys the biggest problems occur when you are ready for painting. Because then you have to ask yourself wich colours you need. Well the only colourpicture I have is the pic below. (its the ship in the back unfortunately)

11075234_527778134028725_667604110713907

That doesnt help me a lot. But you can see the wheelhouse is green, not white anymore.

Thursday 9 April 2015

Last pictures before painting

These are the last pictures before painting with the airbrush. I special love the first picture because with all the parts on the table it really looks like a modelkit.

Modelkit. Anyone knows the brand? All the piece apart is very handy when you paint them. No masking needed.
click for more

Wednesday 8 April 2015

last proceedings building the Antje

Today I did some work on the Antje. Almost ready for painting but there are still some little jobs to do. Here some photo's of how she looks now. She is totally in primer now.

 click for more